How to Seal Coat Your Asphalt Driveway
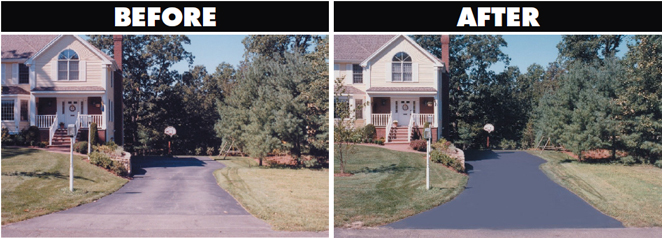
An asphalt driveway is an investment that’s well worth protecting. A little time spent patching and sealing can extend the life of the blacktop and improve the curb appeal—and value—of the home. There’s no better time of year to restore asphalt as soon as possible, and it is better before winter arrives with its punishing weather and sub-freezing temperatures. Before applying a topcoat sealer, inspection the driveway is needed and makes the necessary repair, as follows.
1. Look for trouble spots by vigilantly inspect every square foot of the driveway and make note of any cracks, oily stains, potholes, or areas that are crumbling. If any of these trouble spots on, it is highly recommended to repair that first before proceeding further.
2. Scrub away stains, and this case if oil or grease stains are spotted on, try removing them with hot, soapy water and a stiff-bristle scrub brush. If that fails, dissolve the stains with a degreaser.
3. Fill in cracks, because most driveways will have at least a few cracks, which must be repaired before applying an asphalt sealer. It’s important to repair all cracks, even the smallest ones because it will grow wider and longer over time.
4. Preparation the driveway for sealing is to thoroughly clean the driveway. Start with a push broom and sweep away the heaviest debris. Then use a garden hose, or better yet, a pressure washer to rinse the surface clean of all loose dirt, sand, and grit. Start at the highest end of the driveway and work down and out toward the edges. If the driveway is very dirty and difficult to scrub clean, consider using concentrated asphalt cleaner.
Sealing the Driveway
Here are steps for sealing the driveway.
1. Check the weather forecast before applying the sealer. Depending on the sealer used, two to three days of dry, sunny weather are needed for the sealer to set and dry properly. Make sure the driveway’s surface is entirely dry before starting.
2. Read and examine the instruction carefully for each type of sealers. There are several different types of asphalt-driveway sealers available. The least expensive, tar-emulsion sealers provide minimal protection but only cost about $12 per 5-gallon pail. However, they need constant stirring throughout the application. Asphalt-emulsion sealers are the most popular type of driveway sealer. They cost about $20 to $25 per 5-gallon pail, normally don’t require stirring, and provide outstanding resistance to oil stains and water penetration.
Advanced latex-acrylic sealers last longer, fade less, and dry very quickly. In most cases, the car can go onto the driveway just 4 hours after sealing; for most other sealers 24 hours waiting is needed. These features come at a cost, though: $50 to $65 for 2 gallons of sealer. Lastly, there are industrial-duty liquid-rubber sealers that are fortified with titanium. They give superior surface protection and wear-resistance, but they cost–I hope you’re sitting down—more than $500 per 5-gallon pail.
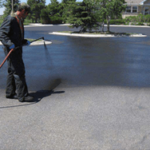
It’s vital to use the exact tools and methods the manufacturer recommends because each type of sealer comes with specific application instructions. Most sealers are applied with a long-handled tool that has a flexible rubber squeegee on one edge and a short, stiff-bristle brush on the other. It is recommended to use the squeegee blade to spread the sealer around and the bristle brush to even it out. Other sealers are applied with a thick-nap paint roller.
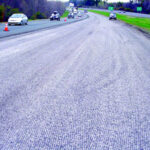
3. Apply the driveway sealer and again, it’s important to follow the manufacturer’s recommendations. Here’s how sealers are typically applied: Pour a 12-inch-wide ribbon of sealant across the driveway, then push and pull the sealant with the squeegee to cover an area that’s about 3 feet wide by the width of the driveway. Repeat this process, overlapping the previous section, until the entire driveway covered. Now immediately go back and use the bristle-brush edge to spread out any excess sealant that may have settled into low spots.
4. Let it dry by allowing the first coat to dry for 6 to 12 hours, then apply a second coat. It’s best to apply two thin coats rather than one thick coat. Once it is finished, use sawhorses or brightly colored ribbons to block the end of the driveway to traffic for at least 24 hours.
Need patio deck in your house? Contact preventivesupport.com
Contact us
Phone Call |
Text Message |