How to Patch Potholes and Preserve Your Surfaces

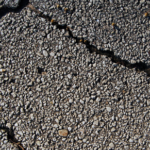
Potholes are a common nuisance on roads, driveways, and parking lots, and they can cause significant damage to vehicles and pose safety hazards. Fortunately, patching potholes is a straightforward process that can be accomplished with some basic tools and materials. In this comprehensive guide, we will outline the step-by-step process for patching potholes effectively, ensuring the longevity and smoothness of your surfaces.
- Gather the Necessary Tools and Materials. Before beginning the pothole patching process, gather the required tools and materials, including safety gear such as gloves and safety glasses. You will need a shovel, a rake, a tamper or compactor, a broom, an asphalt patching material (such as cold patch or hot mix asphalt), and water for activating the patching material. Ensure that the tools are clean and in good working condition to achieve the best results.
- Clean the Pothole. Start by cleaning the pothole and removing any loose debris, dirt, or vegetation from the area. Use a broom or shovel to sweep away loose materials, and if necessary, use a pressure washer to thoroughly clean the pothole and its surroundings. The cleaner the pothole, the better the adhesion of the patching material and the longer-lasting the repair.
- Apply a Bonding Agent. For a more effective repair, apply a bonding agent to the pothole. A bonding agent improves the adhesion between the existing pavement and the patching material, ensuring a stronger bond. Follow the manufacturer’s instructions for the specific bonding agent you are using, as application methods may vary. Typically, the bonding agent is applied evenly to the pothole walls and base using a brush or spray.
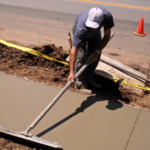
- Fill the Pothole with Patching Material. Once the bonding agent has been applied, proceed to fill the pothole with the appropriate patching material. If using cold patch asphalt, carefully pour the material into the pothole, slightly overfilling it. Use a shovel or rake to spread and compact the material evenly, ensuring that it is firmly packed. For hot mix asphalt, follow the specific instructions for heating, mixing, and applying the material, as the process requires additional equipment.
- Compact the Patching Material. To achieve a long-lasting and seamless repair, compact the patching material using a tamper or compactor. Apply firm and even pressure to compress the material, ensuring it is tightly packed and level with the surrounding pavement. Continue compacting until the patched area is sturdy and there are no air pockets or gaps in the repair. If necessary, add more patching material and repeat the compaction process.
- Allow the Patch to Cure. After compaction, allow the patching material to cure and harden. The curing time may vary depending on the specific product used, so refer to the manufacturer’s instructions for the recommended duration. It is important to avoid traffic or heavy loads on the repaired area until the patch has fully cured to prevent damage and maintain the integrity of the repair.
- Perform Regular Maintenance. To ensure the longevity of your pothole repair, perform regular maintenance on your surfaces. Promptly address any new potholes that may develop and keep your pavement clean and free from debris. Routine sweeping and periodic sealing or reapplication of a surface coating will help protect your surfaces from future damage and extend their lifespan.
Patching potholes is a crucial step in preserving the integrity and functionality of your surfaces. By following the step-by-step process outlined in this guide and performing regular maintenance, you can effectively repair potholes and ensure the durability of your roads, driveways, and parking lots. Remember, a well-maintained surface not only enhances safety but also improves the overall aesthetics and value of your property.
Contact us
Phone Call |
Text Message |