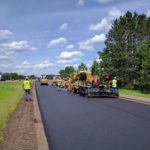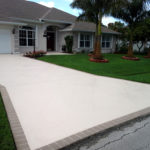
How to Repair Asphalt Driveway
 Many homeowners often found themselves faced with needed repairs for their asphalt driveway. Cracking, potholes, and the unsightly fading appearance are some common issues that people have with asphalt driveways. The binder in the asphalt drying out which can be caused by the lack of maintenance (sealing), overall wear and tear, poor drainage etc are the reason for these occurrences. It is beneficial to maintain the asphalt while it is still in fair or good condition by sealing regularly to prevent it from turning into a much bigger and costly repair, such as replacing the entire driveway.
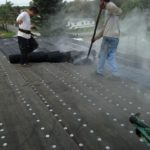
Before repair, generally, preparation of the driveway is needed. The preparation work should aim for thoroughly cleaning the affected repair area and making sure it is clean from dust, debris, vegetation, water or anything that will keep the repair materials from adhering to the existing asphalt.
The preparation work needed should at least incorporate step and consideration as follows.It is very important for the affected area to be as clean and smooth as possible so that the patching material can adhere easily before patching the crack. By using a hammer and chisel, you can remove any broken pieces of asphalt obstructing the crack Next, use a wire brush or a wire wheel on a drill to remove dirt and debris from the crack. Finally, by using a compressed air gun or a shop vac to ensure that all of the loose debris and smaller particles have been removed. If neither an air gun nor shop vac is available to you, you can use a garden hose to flush out the crack. However, if you use a garden hose, you must let the crack dry completely before continuing. Last but not least, regardless of what you use to clean the crack, it’s recommended that you wear safety goggles to prevent and debris from harming your eyes.
Repair Asphalt Driveway
Once you have cleaned the crack in the asphalt thoroughly, you are ready to begin filling the crack. Be aware that smaller and larger cracks require different patching materials. The following steps will instruct you on how to fix both smaller and larger cracks.
For fixing smaller cracks in asphalt (1/8 in – 1/2 in), these you can do. Firstly, fill smaller cracks by using rubberized asphalt-emulsion crack filler. Try to avoid getting any of the filler on unaffected areas as it can stain the driveway. Apply the filler using a caulking gun if available. If you don’t have a caulking gun, the filler can be poured carefully into the crack. Then, use a putty knife or trowel to smooth out the surface of the crack. If a putty knife or trowel is not available, you can use rubber gloves and smooth the crack out with your thumb. Lastly, let the filler dry according to the instructions on the packaging before driving over the affected area.
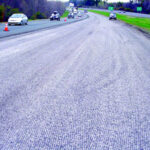
For Fixing Larger Cracks in Asphalt (>1/2 in) required steps are as follows. If the crack you are trying to patch is deeper than two inches, you may wish to first fill the crack up to the two-inch mark with small, crushed, angular gravel. Don’t use pea gravel or other larger gravel as it can shift frequently and does not provide an adequate base. Next, you should compact the gravel using a steel tamper or a 4×4 wooden post. Now fill the crack with a cold process asphalt repair compound, such as blacktop. Compact the compound with a tamper or a 4×4 wooden post. After compacting, you may need to add more blacktop or compound material and repeat the tamping process to ensure a consistent, level driveway.
While the surface blacktop will dry in a day or so, the blacktop beneath may take a few weeks to completely harden. Don’t seal your driveway during this period as it will prevent air from getting to the patch and it will not harden properly.
Contact us
Phone Call |
Text Message |